Docker is commonly used to run services that require network communication like websites. Docker makes this convenient by providing a range of networking options for inter-communication and outer-communication.
In the inter-communication, Docker provides private networks for linking the containers so that the service in the container is not able to be accessed from outside Docker, but from the other Docker containers.
In the outer-communication, the service in the container is available from anywhere, even outside the machine hosting Docker.
This post will describe how to create the outer-communication to chit chat between containers.
Publish ports
Let's create a server and publish some ports on it.
docker run --rm -it -p 12345:12345 -p 12346:12346 --name server ubuntu:14.04 bash
ifconfig # to check IP address
nc -lp 12345 | nc -lp 12346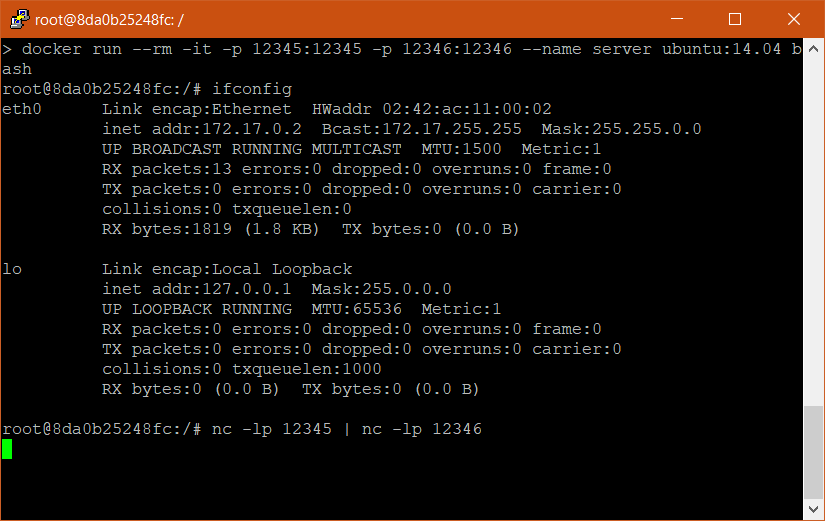
The syntax -p host_port:container_port binds a container's port to a host's port. The command nc -lp 12345 | nc -lp 12346 will let our server listen on port 12345 and pass whatever it receives to port 12346 (google netcat for more detail).
From the server terminal that we have just created, we can see that Docker creates an internal network and assigns IP 172.17.0.2 to our server. We will learn about Docker network in a future post.
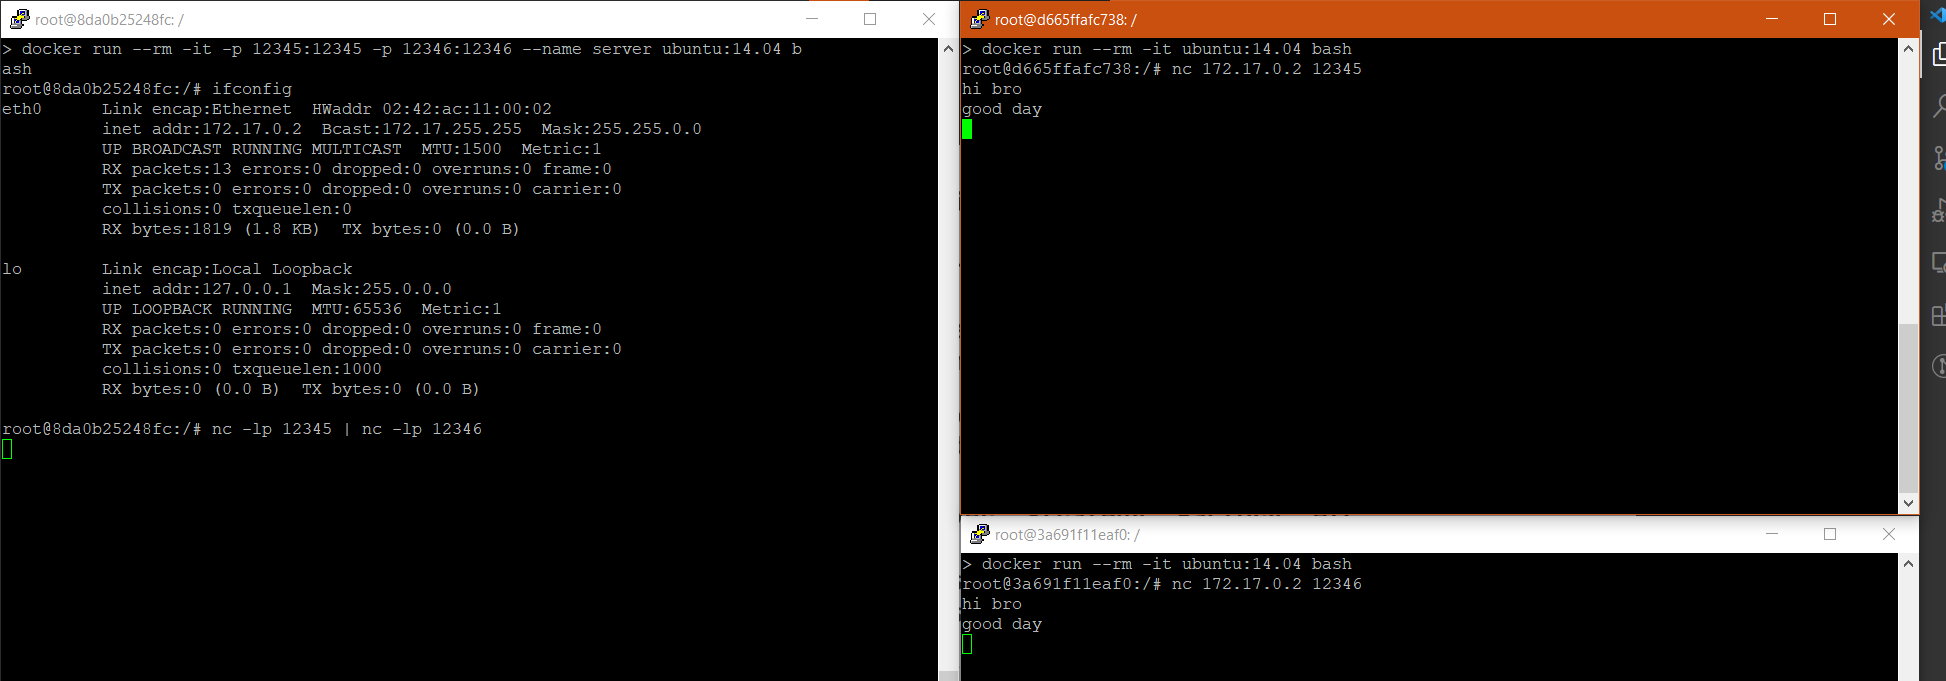
Now, open a new terminal to create client 1 container and connect to server at port 12345.
docker run --rm -it ubuntu:14.04 bash
nc 172.17.0.2 12345
Open another terminal to create client 2 container and connect to server at port 12346.
docker run --rm -it ubuntu:14.04 bash
nc 172.17.0.2 12346
Let's type a message on client 1 terminal and see the message is printed out in client 2 terminal. Hooray! We have just created a one-way chit chat application using Docker and netcat!
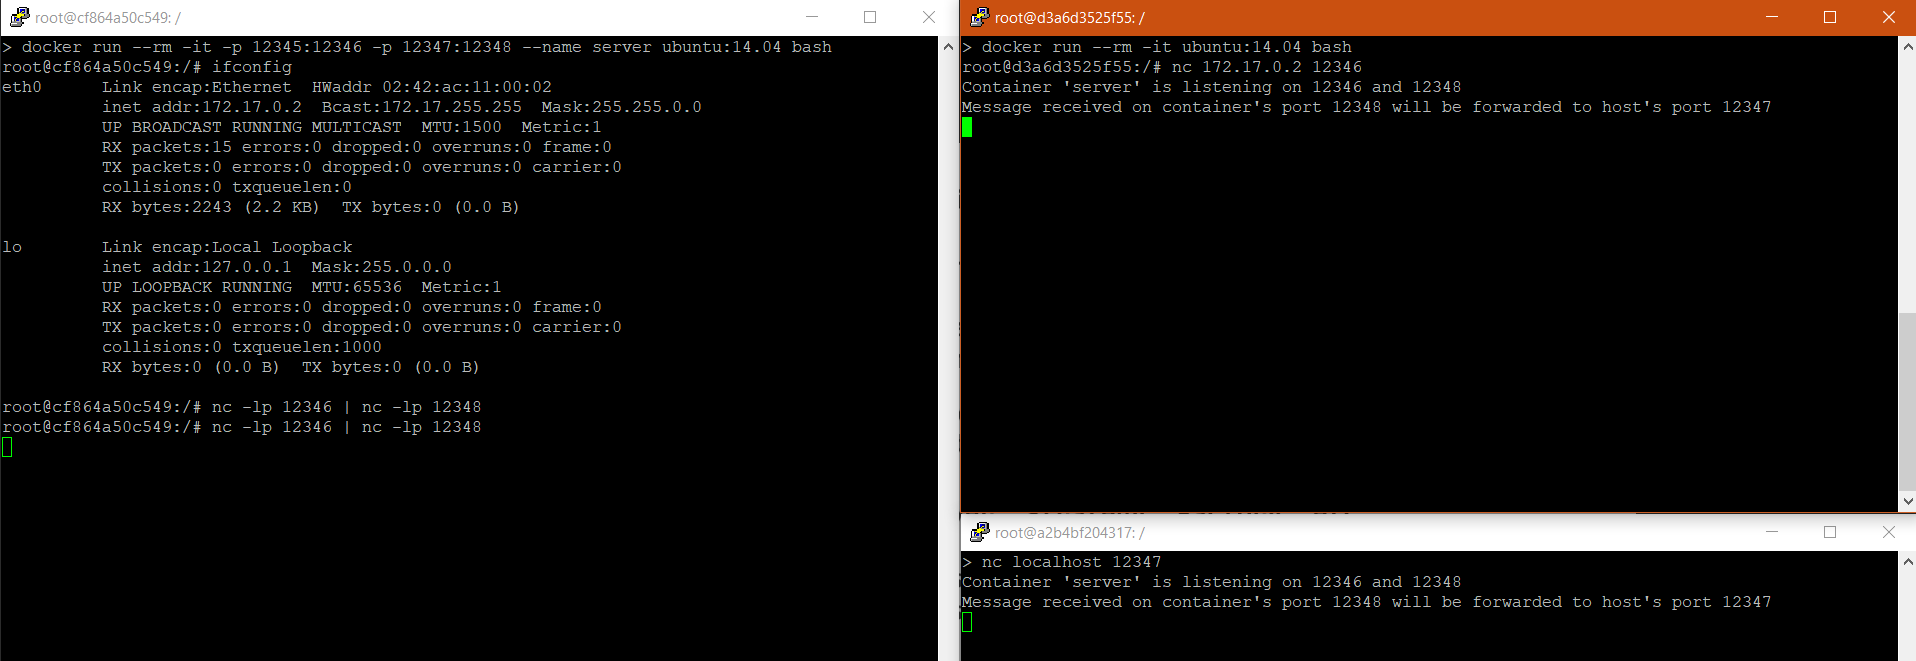
We also can perform this communication by creating 2 clients on local machine (same as above but running on your host instead of running inside a Docker container), or one of them running on local machine whereas the other running on a Docker container. Check the example below.
Publish ports dynamically
When we need to publish many ports on the host, it's very common that some of the host's ports are not available. Docker provides a functionality to let us choose the host's unused ports automatically.
Let's open a terminal to create a server again, bind the container's ports 12346 and 12348. Docker will then choose the host's ports for us.
docker run --rm -it -p 12346 -p 12348 --name server ubuntu:14.04 bashOpen a new terminal, run:
docker port serverThe command result will the container server's ports 12346 and 12348 are bound with xxxxx and yyyyy of the host respectively.
12346/tcp -> 0.0.0.0:xxxxx
12348/tcp -> 0.0.0.0:yyyyy
Now, we should be able to create the one-way chit chat application by running netcat on the host using xxxxx and yyyyy ports. This is a bonus exercise for you!
UDP and TCP ports
Let's open a terminal to create a server again. This time we specify the /udp text at the end of the port number. This will expose the port outside using UDP.
docker run --rm -it -p 12346/udp --name server ubuntu:14.04 bashYou can run docker port server to check the binding port on your machine.
Keynotes
| Flag | Meaning |
|---|---|
-p A:B | Bind container's TCP port B to host's port A |
-p C:A:B | Bind container's TCP port B to host's port A for connections to host IP C |
-p A:B/udp | Bind container's UDP port B to host's port A |
-p A-B:C-D/tcp | Bind a range of ports |