In this post, we will see how to start a container, the meaning of isolated containers and how to create an image from a container.
Before we start, you should know how to open a terminal on your OS.
Docker Image
In the previous post Docker Introduction, we know that:
Docker splits an Operating System into smaller worlds called containers.
To run a container, we need a docker image. An image is just a file which contains just enough that an operating system requires to be able to run.
For example, the Ubuntu .iso file that you download to install Ubuntu on your PC is an image. But this .iso file contains a lot of things such as the GUI, not just the Ubuntu kernel.
Let's run a Ubuntu container. Open a terminal and type:
docker run ubuntu
If this is your first time running ubuntu container, docker will automatically download the ubuntu image for you.
Now, let's type:
docker image ls
The command docker image ls lists all the images in your system. We can see that the downloaded ubuntu image is named ubuntu. It has an ID of 7e0aa2d69a15, a size of 72.7 MB and a tag of latest which is its version.
You can refer to an image by either its ID or the combination of its name and its tag. An image doesn't have to have a name!
Trick: Another way to list down the images is typing command docker images.
Run 2 containers using 1 image
In the previous post Docker Introduction, we know that:
Containers are isolated from one another. A container has everything needed to run your code such as your code, configuration files, your tools, networking system and just enough of the operating system to run your code.
Let's see what isolated word means. Open terminal 1, and type:
docker run -it ubuntu:latest bash
This command will run a container from image ubuntu with version latest. -it flags help us to interact with the running container via its terminal. bash is the command we want to run inside the container's terminal. Now we are inside a container's terminal. Let's create a file named FILE by typing:
touch FILE
ls
Now, keep terminal 1 opening, open terminal 2, and run another container:
docker run -it ubuntu:latest bash
ls
We see that the file FILE is in the first running container, but it's not in the other one. This is the meaning of isolated word.
Containers are isolated from one another. The files that we create in a container won't be put into the image where the container comes from. Those created files live and die along with the container.
To exit the container's terminal, you can either press Ctrl + D or typing exit.
When you exit the container's terminal, you also stop the container. To check all the containers that you run, let's type:
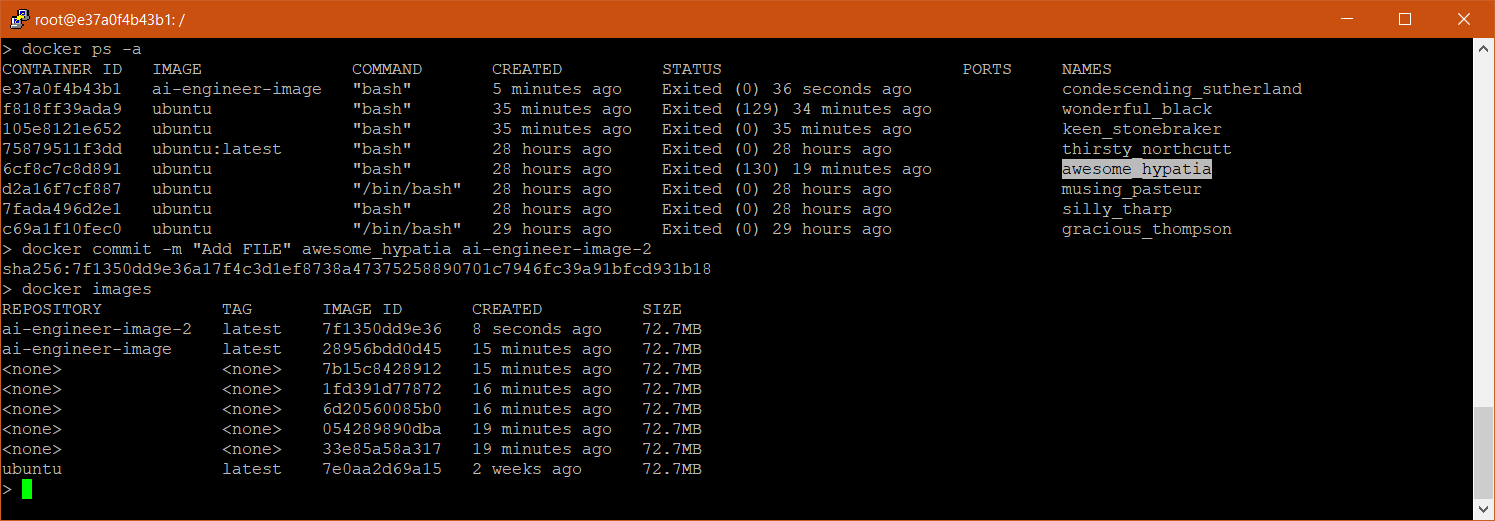
docker container ls -a
Without flag a, this command just shows the running containers. This flag will help us to show the stopped containers also.
Trick: Another way to list down the containers is using docker ps -a.
Now, let's open the container where I created the file FILE and interact with its terminal. In my case, it is the stopped container with the ID of 6cf8c7c8d891. Let's type:
docker start -ia 6cf8c7c8d891
ls
The flags ia help us to open the container terminal and interact with it. Now you can see the file FILE is still there because the container is not died or deleted yet. It's just stopped :)
Trick: A slow way to start the container is using docker container start container_id.
Kill and remove container
When you kill a container, you also stop the container and it goes to the stopped state.
When you finish your work with the container which is in the stopped state, you remove it.
docker kill container_id
docker rm container_id
Create image from existing container
Now, let's type:
docker commit -m "Add FILE" 6cf8c7c8d891
This command takes the container and creates an image from it with a message Add FILE. Docker will generate an ID for the image. As you can see in my case the ID is 28956bdd0d45.
Let's check all the existing images:
docker images
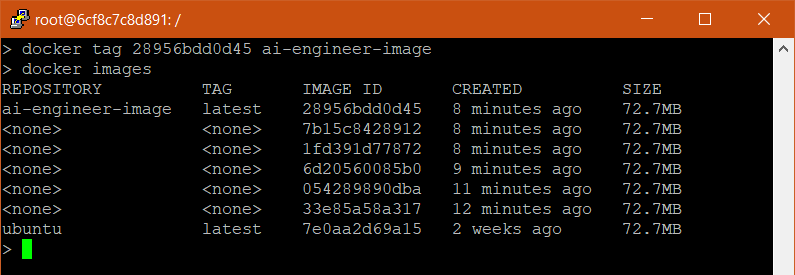
We can see the created image with the ID of 28956bdd0d45 and it doesn't have a name. Let's give it a name:
docker tag 28956bdd0d45 ai-engineer-image
docker images
Now, let's start a container from the ai-engineer-image:
docker run -it ai-engineer-image bash
ls
The container has the file FILE as expected!
Trick: Another way to commit and tag in one command is using docker commit container_id image_name. This should be the command you use daily.

Note on the size of images
When you look at the size of the images on your machine (use docker images to list them), you can misunderstand that those images take a lot of space on your machine. Actually, they are sharing the underlying data. So please don't get scared by the size, they are all just 72.7MB like the image showed below.

Note on the image name structure
The full image name structure is
server_address:port/organization/image_name:tagserver_address can be your machine or a server. port is the port number of server_address. tag is the image tag i.e. v14.04 or latest. Leave out the parts you don't need.
Keynotes
- Image commands
# list images
docker image ls
docker images

# download image ubuntu with tag 14.04
docker pull ubuntu:14.04

# remove image
docker rmi image-name:tag
docker rmi image-id- Container commands
# list all containers
docker container ls -a
docker ps -a

# run new container
docker run image_id

# run new container with interactive terminal
docker run -it image_id bash

# start stopped container
docker container start container_id
docker start -ia container_id

# kill container
docker kill container_id

# remove container
docker rm container_id- Commit commands
# create an image from a container
docker commit -m "Message" container_id

# Give an image a name with tag
docker tag image_id image_name:tag

# create an image from a container and give it a name
docker commit container_id image_name- Full image name structure
server_address:port/organization/image_name:tag